
Django with Docker
Learn everything about deploying Django projects with docker on Doprax. We will deploy the Django project with Postgres as the database, and also we will use Whitenoise to serve our static files. Furthermore, we will use Gunicorn as the WSGI HTTP server. The final deployed Django website is accessible here. You can find the repository of the Django project code here.
Install Django
To use Django, you must install it on your machine (and also the server). You can install it system-wide or in a virtual environment. To avoid conflicts with other packages, it is strongly recommended to use virtual environments to install any python requirements. We are going to use the python3-venv package to manage the virtual environments. Also, to install any Python packages, you need to have pip on your machine. Let’s install pip and venv. Since we will be using Docker, you should also install it.
sudo apt-get install python3-pip
sudo apt-get install python3-venv
sudo apt-get install docker.io
Now let’s create our virtual environment.
python3 -m venv book_env
From the above code, it is seen that the name of my virtual environment is book_env. The folder book_env will be created in your current directory. Activate your virtual environment using the command below.
source book_env/bin/activate
Now it’s time to install the packages we will be using. We are installing Django, whitenoise, gunicorn and psycopg2.
pip install django whitenoise gunicorn pyscopg2
Create a Django Project
So far, we have created and activated our virtual environment, installed Django. It is time to create a new project.
django-admin startproject Book_store
This command will create a new Django project named Book_store in the current directory. Now change directory to Book_store and then include your requirements.txt file using the below commands.
cd Book_store
pip freeze > requirements.txt
Let’s create an app called pages in our Book_store project.
python manage.py startapp pages
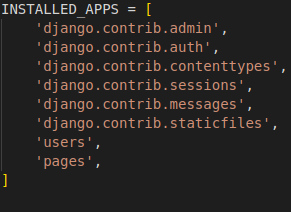
Using the above command, a new folder named pages is created. The first thing that we need to do when creating a new Django app is to add it to the installed apps list in settings.py. So open Book_store/settings.py file and add ‘pages’ to the end of the INSTALLED_APPS list.
Create a simple page
Now let’s continue by creating a simple page in our newly added Django app. Open pages/views.py and create a class to handle our first page.
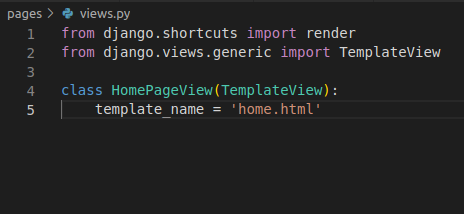
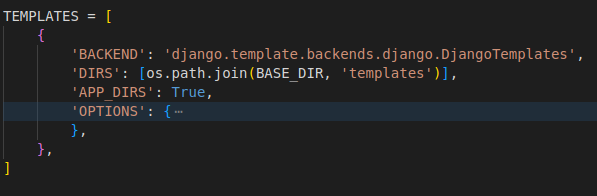
Above, our first page is the home.html file. We have to specify location of our templates folder in Book-store/settings.py, in the TEMPLATES section so that Django can know where to find home.html.
Now let’s create home.html file in templates folder and put a little html.
{% extends 'base.html' %}
{% block title %}Home{% endblock title %}
{% block content %}
<h1>Homepage</h1>
<p>This is where different books will be seen. You can select any of them.</p>
{% endblock content %}
Above you will notice we are extending from base.html. So create a base.html file in templates folder also and insert this html below.
<!DOCTYPE html>
<html>
<head>
<meta charset="utf-8">
<title>{% block title %}Bookstore{% endblock title %}</title>
</head>
<body>
<div class="container">
{% block content %}
{% endblock content %}
</div>
</body>
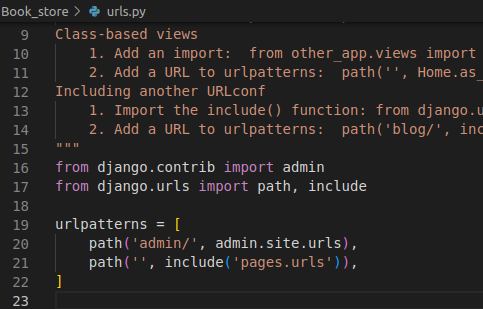
</html>So let’s create a URL to call the class based view. Create an urls.py file in the pages folder. Add the code below.
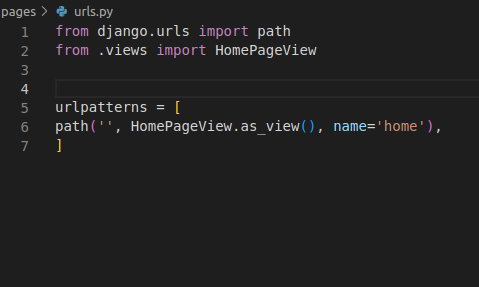
Since we have defined our URL in the app directory(i.e. in pages folder), we need to include it in the project directory (i.e. urls.py in Book_store folder).
Dockerize the Project
Docker is a very good platform to package and deploy software. Doprax deploys your Django application on Docker. You don’t have to use Docker for your development environment, although we strongly suggest it. To learn the basics of docker visit here. We have created our Django project. It is time to dockerize it and then deploy it on the Doprax cloud platform.
Deploying on Doprax requires us to have our Dockerfile and also doprax.yaml file. Normally when dockerizing our project we make use of Dockerfile and docker-compose.yml file, but the doprax.yaml file will be taking care of what docker-compose.yml does. You can still use the docker-compose.yml file but you will have to set environment variables and volumes manually on Doprax cloud platform. So let’s go!
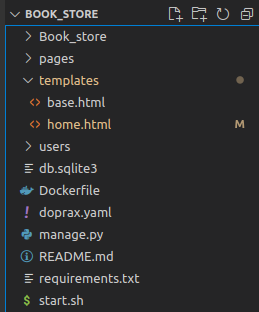
Create Dockerfile and doprax.yaml file in your project directory. Also, create a start.sh file.
In your Dockerfile, add the Below code.
# pull base image
FROM ubuntu:22.04


RUN apt-get update && apt-get install -y python3 python3-pip python3-venv
RUN python3 -m venv book_env

WORKDIR /code

# install dependencies
COPY requirements.txt /code/
RUN /book_env/bin/pip install -r requirements.txt

# Copy project
COPY . /code/
EXPOSE 8000
RUN chmod +x /code/start.sh
ENTRYPOINT ["./start.sh"]
So above we are telling docker to :
- set our base image as ubuntu version 22.04 image.
- install python3, python3-pip, python3-venv.
- create a virtual environment named book_env.
- create our working directory /code.
- copy our requirements.txt file into the working directory.
- install all packages in the requirements.txt file.
- copy all our folders to the working directory.
- expose port 8000.
- execute the instructions in the start.sh file.
In your start.sh file add the below code
#!/bin/bash
source /book_env/bin/activate
cd /code

echo "----- Collect static files ------ "
python manage.py collectstatic --noinput

echo "-----------Apply migration--------- "
python manage.py makemigrations
python manage.py migrate

echo "-----------Run gunicorn--------- "
gunicorn -b :8000 Book_store.wsgi:application
Above we are:
- activating our environment
- serving our static files
- running our migrations
- using gunicorn to run our application
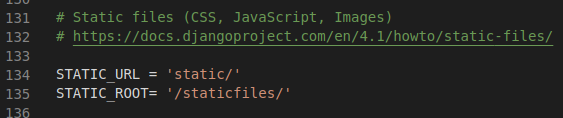
So since we are serving static files, we need to include whitenoise in Book_store/settings.py, in the MIDDLEWARE section. We also need to specify our STATIC_ROOT.

Now let’s put some lines of code in doprax.yaml file
volumes:
  - name:  static
    mount: /staticfiles/
envs:
  - DB_PASS: random_pg
    type: password
  - DB_NAME: bookstoreDB
  - DB_HOST: postgresql

services:
  - postgresql:
      tag: 11
      volumes:
        - name: postgres_vol
          mount: /var/lib/postgresql/data/
      envs:
        - POSTGRES_DB: bookstoreDB
        - POSTGRES_USER: negeek
        - POSTGRES_PASSWORD: random_pg
Above we are:
- creating volumes named static, where our static files will be persisted.
- creating our database environment which will be used by Django in our settings.py file.
- using the Postgres version 11 image.
- adding volumes for persistence.
- defining the environment variables for creating the database.
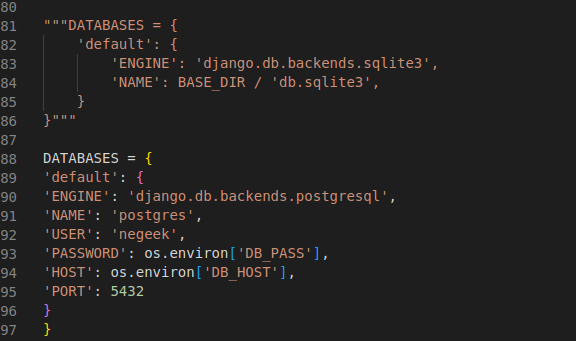
Now let’s go to the settings.py file to define the database in accordance with the doprax.yaml file. Comment out the one for sqlite3.
Congrats! You have successfully dockerized your project. You can try running it locally, then pushing it to GitHub!
Deploy on the Doprax cloud platform
Doprax is a very cool cloud platform for hosting your websites, apps, and APIs.
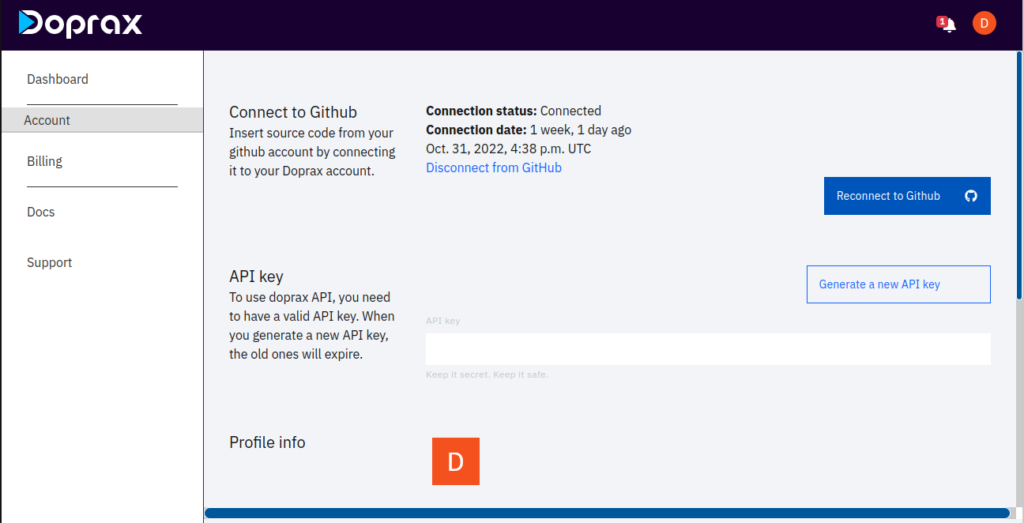
Create your account on Doprax and head to the Account section and connect your GitHub account.
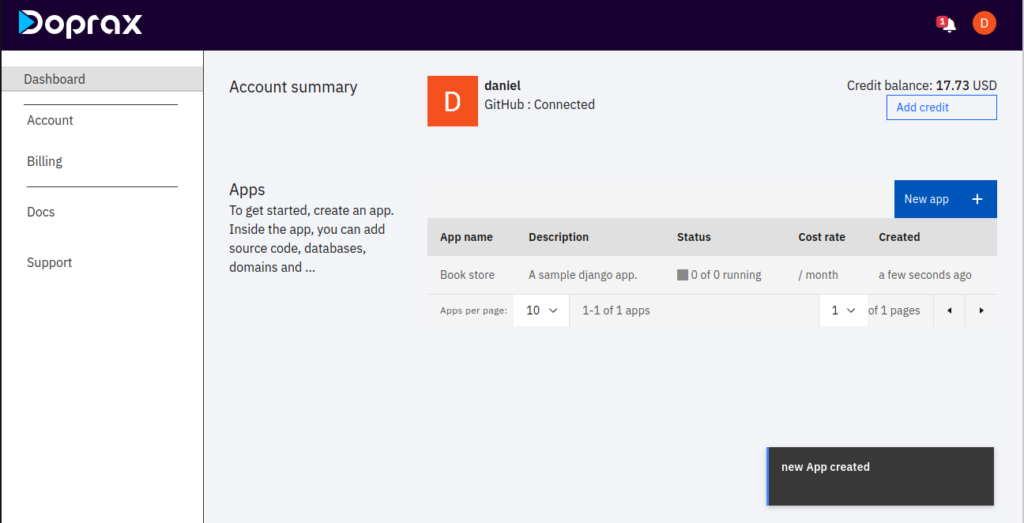
Create an App by heading to the Dashboard section and clicking New app. Give it a title and Description.
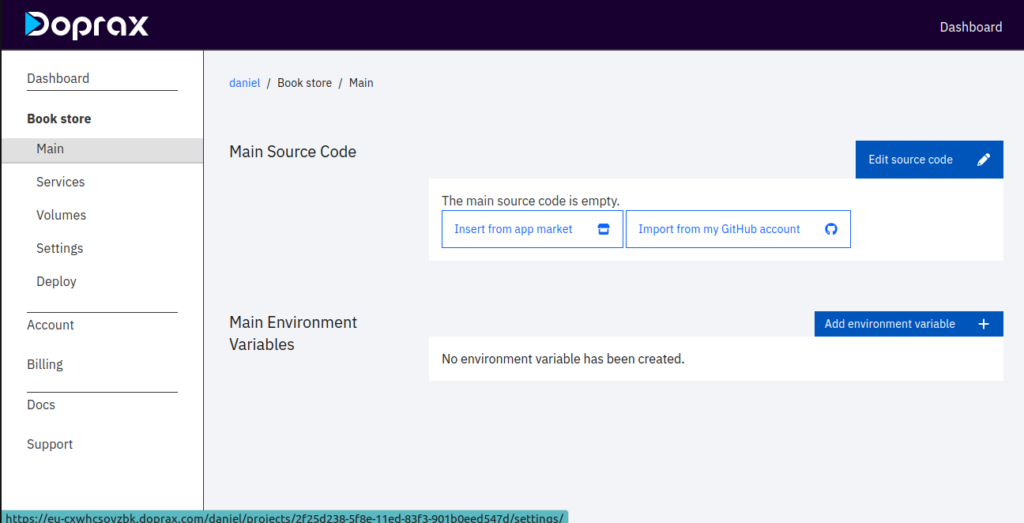
Click on the created app and click on import from my GitHub account.
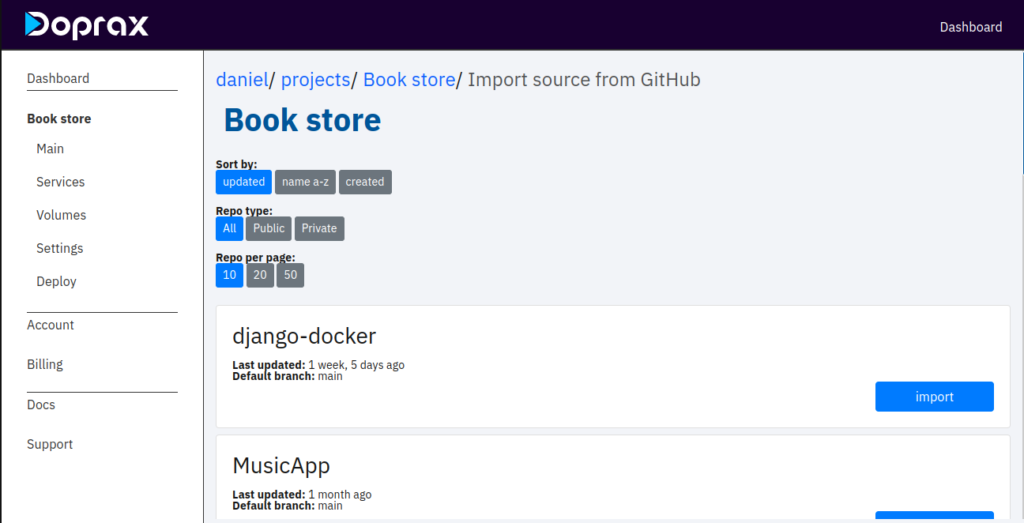
Import the repository you created on your GitHub.
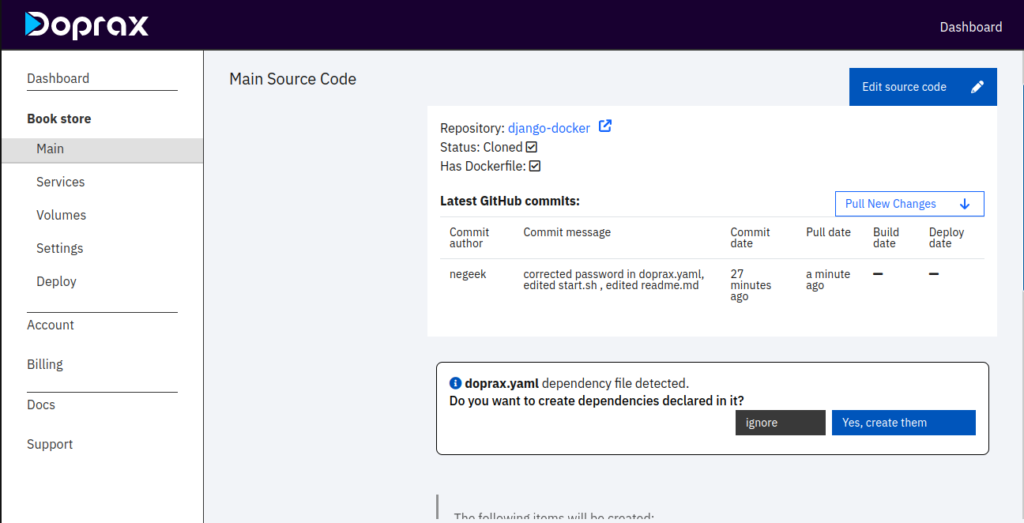
After importing your code from github you will notice there is a message saying “doprax.yaml dependency file detected. Do you want to create dependencies created in it?”. Click Yes create them.
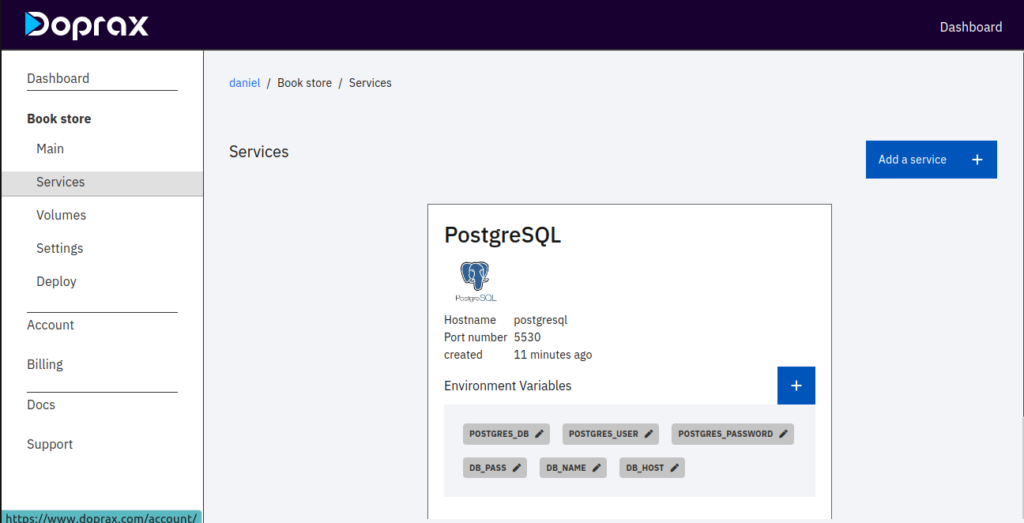
Go to the Services section. You will notice PostgreSQL is automatically set up for you. This is because we allowed doprax to create the dependencies in doprax.yaml file. Add (DB_NAME, DB_PASSWORD, DB_HOST) to the ones already in the Postgres environment variables. click on the + sign in the Environment variables section and put the corresponding keys and values.

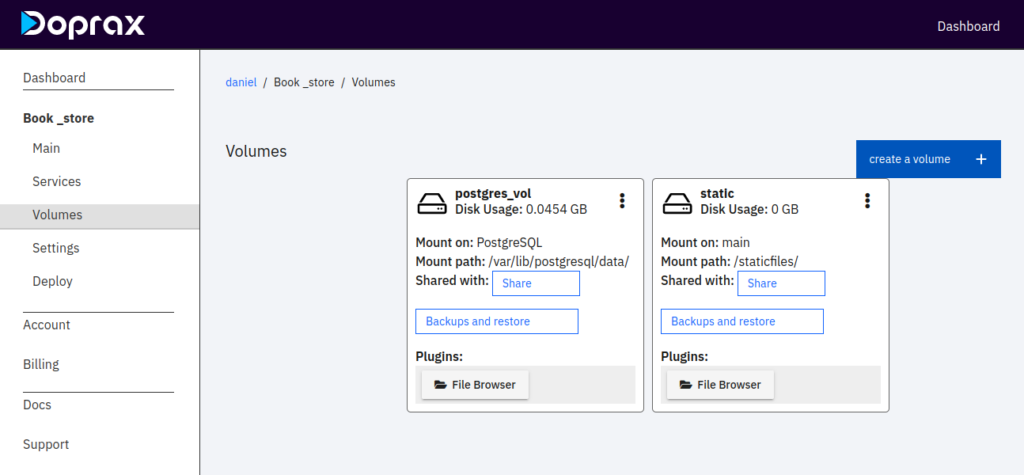
Now go to the Volumes section, and you will also notice it is automatically set.
Setting Volumes and Environment Variables manually
To set environment variables, go to services. In our project, we used Postgres as our database and set environment variables locally. We have to set it up on Doprax. In service, click on Add a service. You will see the list of services Doprax offers.
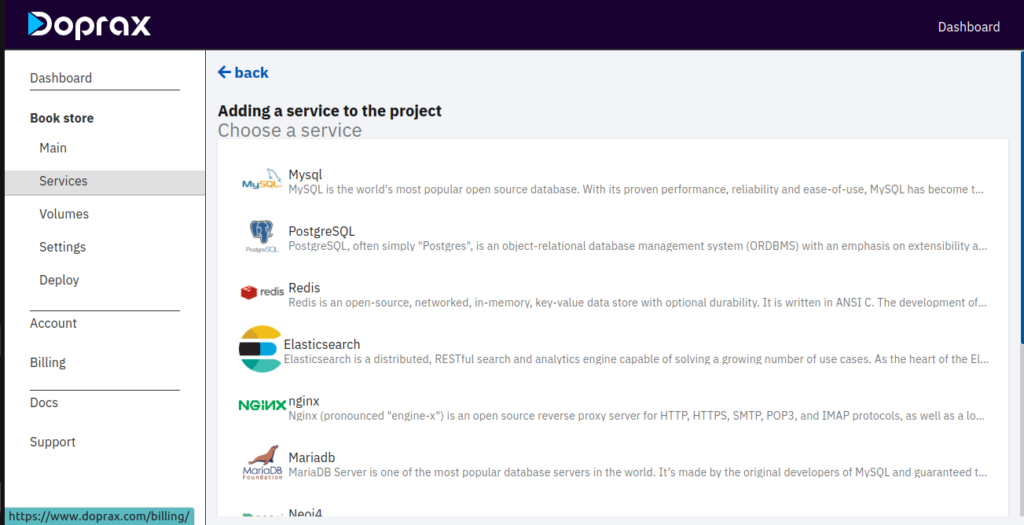
Now click on Postgres and add it. Then click on the plus sign in the Environment variables section and start adding (POSTGRES_DB, POSTGRES_USER, POSTGRES_PASSWORD, DB_PASS, DB_NAME, DB_HOST) as keys and their corresponding values as in your docker-compose.yml file.

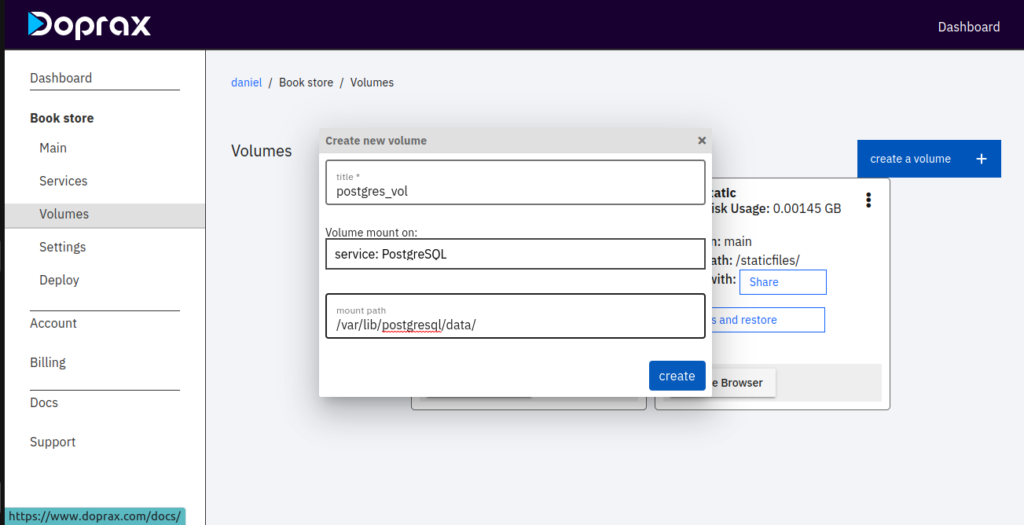
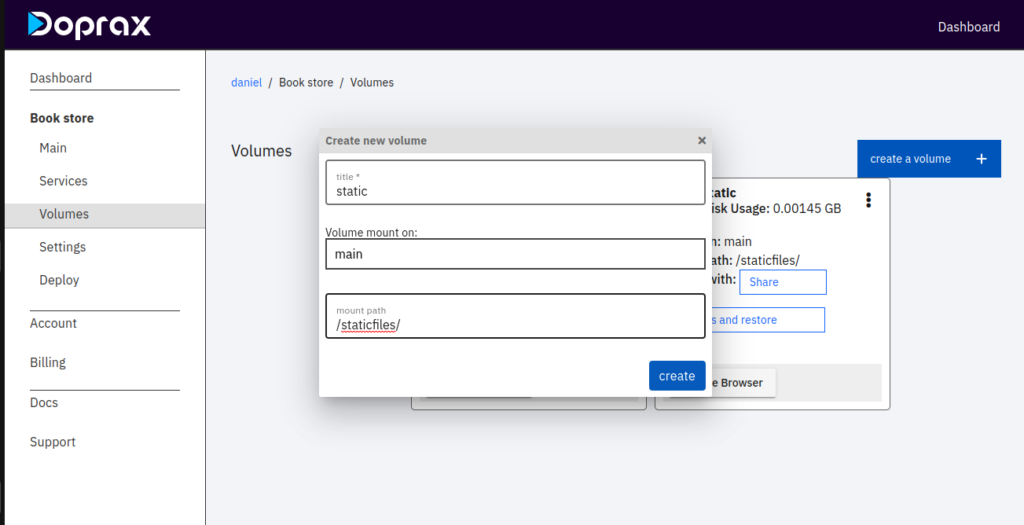
Now it is time to set our volumes. In your doprax.yaml, you have one volume for your database and another for your static files. So head to the Volumes section on Doprax and click on create volume. Give it a title, mount on, and mount path (corresponding to your doprax.yaml file ). The images below show the volume for the database and static files.
Finally, head to the Deploy section and press the play button.
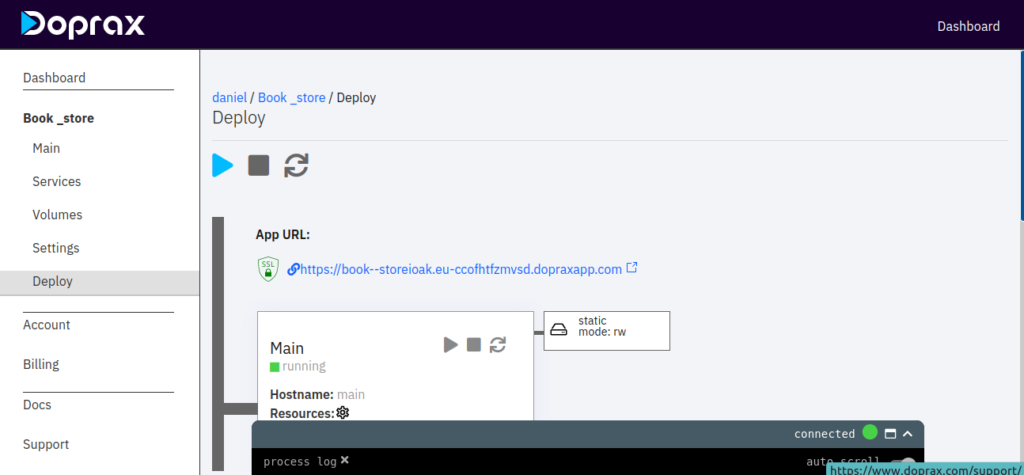
Congratulations, your Django App is deployed!
Create a superuser admin
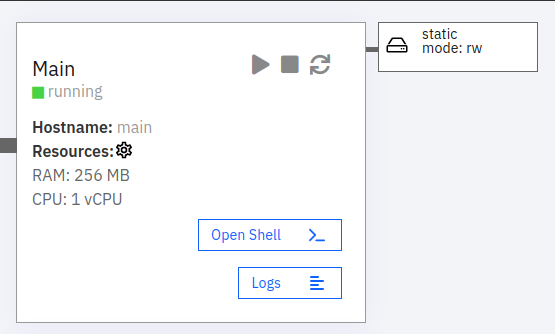
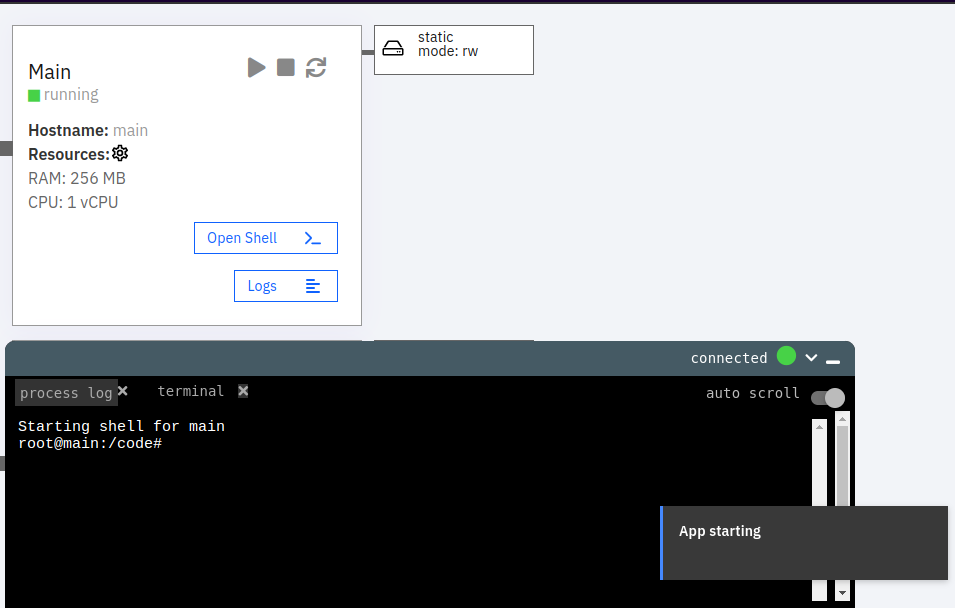
To access the admin interface of your project you need to create a superuser. And to do that you need shell access to the project. When the deployment procedure is finished and the status of the main source and all services are turned running, you can access the shell by clicking on the Open Shell button. Let’s do that. Click on the Open Shell button as it is shown in the image below:
A new shell window will appear on the screen and you will be logged in as the root user. This is a pseudo-shell, and not a real ssh client since doprax does not run ssh client on your container code for security reasons. The current working directory is /code since it has been defined as such in our Dockerfile. Remember that our virtual environment path is /book_env/ so we need to activate our virtual environment to be able to execute any Django commands.
Now you can do everything that you need to do with the Django project including, making the migrations, do the migrations, create the superuser, and other commands. Let’s create a superuser first.
source /venv/bin/activate
python manage.py createsuperuser
It will ask you to choose a username and enter your email address. Then it will ask you to set a password and repeat the password.
In case you have made changes in your database locally, you can make migrations on the shell to apply those changes.
python manage.py makemigrations
python manage.py migrate