
Redis is a powerful open-source in-memory data structure store that can be used for a wide range of purposes including as a database, cache, message broker, and streaming engine. It offers a variety of data structures such as:
- strings
- hashes
- lists
- sets
- sorted sets with range queries
- bimaps
- hyperlogslogs
- geospatial indexes,
- and streams.
It also allows users to perform atomic operations on these data structures, including:
- appending to strings
- incrementing hash values
- pushing elements to lists
- computing set interscetions, unions, and differences.
Redis is optimized for top performance and can be used in-memory or with various levels of on-disk persistence depending on the user’s needs. It also includes features such as built-in replication, Lua scripting, LRU eviction, transactions, and high availability through Redis Sentinel and Redis Cluster.
Redis is widely supported by various programming languages and can be used on most POSIX systems like Linux, BSD, and Mac OS X, though there is no official support for Windows.
To know more you can read the official documentation here.
Redis on Doprax Cloud Platform
On Doprax you can add Redis service to your project. Before that though you have to
- Sign up and Sign in to the Doprax cloud platform
- Connect your GitHub account
- Create New App and either import the code from App Market or from your Github.
If you have done the above already, head over to the Services section and click Add a Service.

After clicking the Add a service button a page showing the different services Doprax offers appears. Pick Redis and click the Add button.

The first image above shows that default Doprax persists Redis data by mounting to /data to prevent data loss if the app is restarted. By clicking the checkbox, you can decide if you want it to persist.
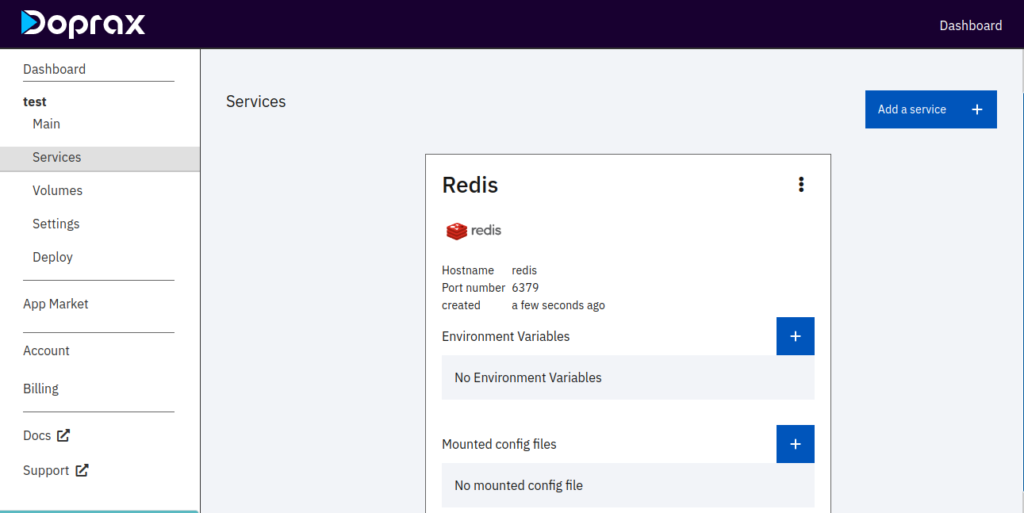
In the second image, there is the Environment Variables and Mounted config files section. In Environment variables, if you click on the + button, you will see a pop-up with the key, and value section. So you fill it based on what you have in your project.

In Mounted config files, if you click on the + button, you will see a pop-up that shows fields to create redis.conf file and also provide the path to mount it.


The only thing left is volume. Go to the ‘Volumes’ section, you will notice it has been created already for Redis. This is because Doprax was allowed to create it when we were adding Redis service.
