Holla chicos! In this article, we’ll explore the OpenAI API Python library to build an app for multiple functionalities like code generation or answering questions, etc… With this app, users can input prompts and receive answers via a Telegram bot. While we won’t cover the setup of the Telegram bot here, you can find a tutorial for it in this link( How to make Telegram bot). We assume that you have basic Python and docker knowledge.
Our focus will be making a Python app and using the Telegram bot as an interface to interact with the app. Let’s go and get started!
A very simple explanation of Openai API and its Python package:
The OpenAI API is a tool created by OpenAI that allows developers to access state-of-the-art artificial intelligence models through a simple interface. These models are trained on vast amounts of data and can perform various tasks like generating text, answering questions, translating languages, and more.
With the OpenAI API, developers can integrate these powerful AI capabilities into their applications with just a few lines of code. This means that even developers without expertise in machine learning can leverage advanced AI technology to enhance their projects.
Using the API involves sending a request to the OpenAI servers with input data, such as a prompt or a question, and receiving a response containing the AI-generated output. This allows developers to harness the power of AI models without needing to train or maintain the models themselves.
In this article, we are going to use the Python package to use the API. But first, lets’s take a look on what is its Python package?
Openai Python package
OpenAI offers several Python packages designed to interact with their various APIs and models. These packages provide developers with tools to integrate OpenAI’s NLP capabilities into their applications.
There is a general-purpose Python package called Openai which is for interacting with APIs. It provides functions to send requests to OpenAI’s services, such as the GPT (Generative Pre-trained Transformer) API, which allows users to generate human-like text based on prompts.
The package simplifies the process of interacting with its APIs by providing convenient functions and classes for sending requests and receiving responses. This includes authentication, constructing API requests with appropriate parameters, and handling responses from the API.
By abstracting away the complexities of API communication, the openai package makes it easier for developers to integrate AI capabilities into their applications. Instead of dealing with HTTP requests, response parsing, and error handling manually, developers can use the high-level functions provided by the package.
The package is designed to be flexible and customizable, allowing developers to tailor their interactions with the APIs according to their specific needs. This might include setting parameters for text generation, specifying language preferences for translation, or configuring other options supported by the APIs. Also, Openai provides comprehensive documentation and support for its packages, including usage examples, API reference guides, and troubleshooting resources. This helps developers quickly get started with integrating its capabilities into their projects and resolve any issues they encounter along the way.
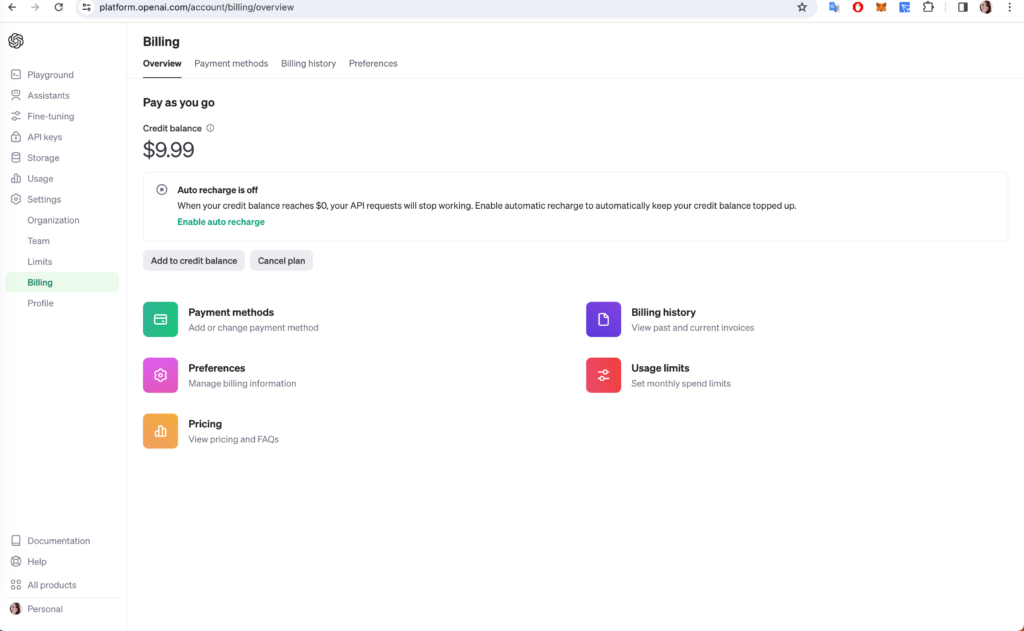
Please remember that using the OpenAI API requires purchasing credits, which are separate from the ChatGPT4 subscription. you can buy credit at the billing page:
Step 1: Installing the OpenAI Package
Let’s open vscode or any other code editor, and create a Python file let’s say pitonita.py. Let’s activate the Python virtual environment, With your environment set up, you can now install the OpenAI Python package. Run the following command in your terminal:
pip install openai
Step 3: Getting Your API Key
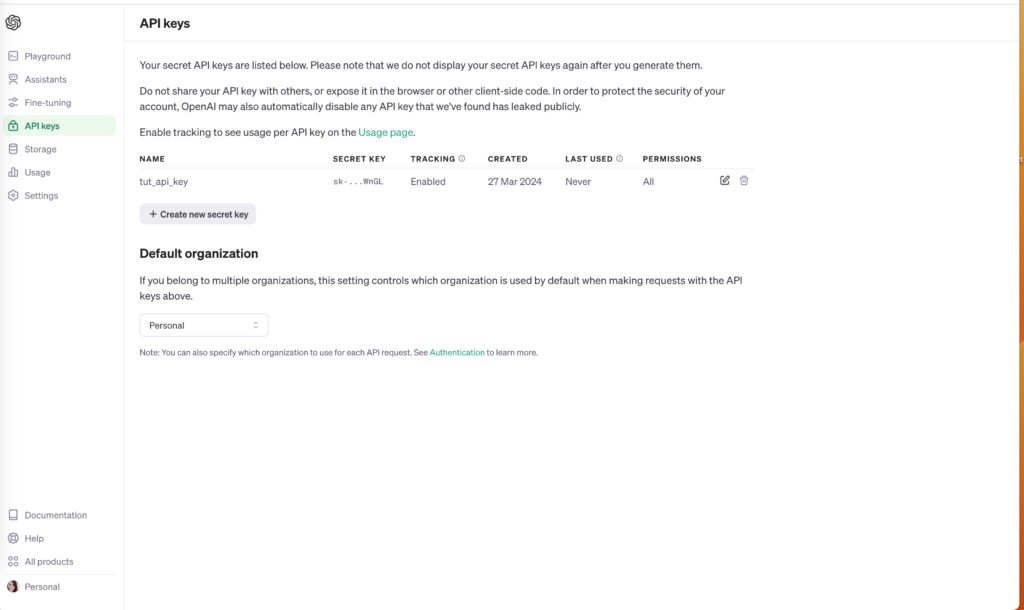
To use the OpenAI API, you’ll need an API key. You can get one by signing up at the OpenAI API website and going to the API section to find your key. After logging into your account you can find the API section at this address: https://platform.openai.com/api-keys.
Step 4: Writing Your Python Script
Open pitonita.py in your favorite code editor which is vscode :)) and then write a script that uses the OpenAI API to generate code.
First, import the Openai package and set your API key. Replace ‘your_api_key_here’ with the API key you obtained earlier. We gonna be explaining line by line of this script in the next section.
from openai import OpenAI
client = OpenAI(api_key="your_api_key")

completion = client.chat.completions.create(
  model="gpt-3.5-turbo",
  messages=[
    {"role": "system", "content": "You are a helpful assistant."},
    {"role": "user", "content": "Hello!"}
  ]
)

print(completion.choices[0].message)
Importing the OpenAI library:
from openai import OpenAI
This line imports the OpenAI class from the openai library, which is a Python package that provides a way to interact with OpenAI’s APIs.
Creating an OpenAI client:
client = OpenAI(api_key="your_api_key")
This line creates an instance of the OpenAI class, which is used to interact with the API. You need to replace "your_api_key" with your actual API key provided by OpenAI.
Sending a request to generate a completion:
completion = client.chat.completions.create(
  model="gpt-3.5-turbo",
  messages=[
    {"role": "system", "content": "You are a helpful assistant."},
    {"role": "user", "con} ]
This part of the code is where the request to the API is made. It specifies the use of the gpt-3.5-turbo model to generate a text completion. The messages parameter is a list that provides context for the model:
- The first item in the list,
{"role": "system", "content": "You are a helpful assistant."}, acts as an instruction to the model, telling it to behave as a helpful assistant. Theroleof this message issystem, indicating that it’s an instruction or information for the model rather than part of the conversation. - The second item,
{"role": "user", "content": "Hello!"}simulates a user’s message to which the model should respond. Theroleisuser, indicating this is part of the conversation that the model should consider when generating a response.
Printing the generated completion:
print(completion.choices[0].message)
After the API call, the response (completion) contains the generated text among other details. The completion.choices[0].message accesses the first (and typically only) generated response’s message content. This line prints the model’s reply to the terminal.
Step 5: Running Your Script
Save pitonita.py file and run it in your terminal with:
python pitonita.py
You should see the generated Python code printed on your terminal. The output might vary slightly each time you run your script due to the nature of AI-generated content.
Step 6: Building Interface
Building an interface for Openai API results is essential to enable users to interact effectively with the AI-generated content. Such an interface serves as a bridge between users and the advanced AI capabilities offered by this API.
Users need this interface because it provides them with a user-friendly way to input prompts or questions and receive AI-generated responses. Without it, users would have to manually interact with the API through code, which can be daunting for those without programming experience.
To build such an interface, you typically choose a suitable technology stack based on factors like the target platform (web, mobile, desktop) and the preferences of the user base. For instance, if targeting a broad audience, a web-based interface might be the most accessible option. Right now in this way we just have the result in the terminal as an output but we are going to use Telegram bot as an interface as it’s easy and simple to begin.
Telegram bot as the interface
Open the Telegram bot and search for botfather account to create a new bot, Let’s name it Pitonita 🙂
Let’s start to write our telegram bot script, starting by installing packages:
pip install pyTelegramBotAPI requests
Both packages installed successfully, let’s start writing the Python script. we are going to use Openai API in this telegram bot and send the result to users when they send a prompt. So we will combine our first script with this script and create one unit so that telegram can be a bridge between Openai and the user.
import telebot
from openai import OpenAI
client = OpenAI(api_key="openai_api_key")
bot = telebot.TeleBot("telegram_token")

@bot.message_handler(commands=['start', 'help'])
def send_welcome(message):
    bot.reply_to(message, "Hola chicos, I'm pitonita! I generate python code. enter your prompt i will give you the code ")

@bot.message_handler(func=lambda message: True)
def generate_code(message):
    prompt = message.text
    if prompt:
        try:
            response = client.chat.completions.create(
                model="gpt-3.5-turbo",
                messages=[
                    {"role": "system", "content": prompt},
                ],
                max_tokens=50,
            )
            print(response.choices[0].message.content)
            if response.choices:
                code = response.choices[0].message.content
                bot.reply_to(message, "Here's the generated code:\n" + code)
            else:
                bot.reply_to(message, "No code was generated.")
        except Exception as e:
            bot.reply_to(message, f"Error generating code: {e}")
    else:
        bot.reply_to(message, "Please provide a prompt for generating code.")

bot.polling()
Let’s explain this script line by line!
Importing Necessary Libraries:
telebotis a class of pyTelegramBotAPI library which is one of the popular Python libraries for building Telegram bots- and as you know
openaiis the Python library for interacting with OpenAI’s API.
- Setting up API Clients:
- The
OpenAIclient is initialized with your OpenAI API key. This client will communicate with OpenAI’s API to generate code. - The
TeleBotinstance is created with your Telegram bot token, which enables your script to interact with the Telegram Bot API.
- The
- Defining Command Handlers:
- The
@bot.message_handler(commands=['start', 'help'])decorator is used to define a function (send_welcome) that will be called when a user sends/startor/helpcommands to the bot. This function sends a welcome message to the user.
- The
- Handling Incoming Messages:
- The
@bot.message_handler(func=lambda message: True)decorator ensures that any message not caught by the previous handlers goes to thegenerate_codefunction. This function acts as the main logic to process user prompts and generate Python code in response. - Within
generate_code, the user’s message text is used as a prompt for the OpenAI Codex model to generate Python code. Theclient.chat.completions.createfunction is called with the prompt, and the model’s response is then sent back to the user via the bot.
- The
- Error Handling:
- The code generation process is wrapped in a
try-exceptblock to catch and respond to any errors during the API call or code generation process.
- The code generation process is wrapped in a
- Polling:
- Finally,
bot.polling()is called to start the bot. This method keeps the bot running, listening for messages from users, and processing them according to the defined handlers.
- Finally,
Step 7: Dockerization and deploying it on Doprax
Since we will be deploying our app on doprax, need to dockerize it. To dockerize the app you need to follow several steps. These steps include creating a Dockerfile to define your container’s environment:
1. Create a Dockerfile
create a Dockerfile in the same directory of your main project. It’s essential to capitalize D in Dockerfile while creating it otherwise when deploying you gonna have error.
FROM python:3.9-slim

WORKDIR /usr/src/app

COPY . .

RUN pip install --no-cache-dir -r requirements.txt

EXPOSE 80

ENV OPENAI_API_KEY=OPENAI_API_KEY
ENV TELEGRAM_BOT_TOKEN=TELEGRAM_BOT_TOKEN

CMD ["python", "./potinita.py"]
After dockerizing it’s important to not keep API keys in the main script and import them as environment variables.
Firstly, utilizing environment variables ensures the security of your API keys by keeping them separate from your codebase, reducing the risk of accidental exposure. Secondly, Docker provides a convenient and reproducible environment for running your application, allowing you to package all dependencies, configurations, and secrets in a containerized environment, making deployment and scaling easier and more consistent across different environments.
By loading the API keys as environment variables during runtime, you can easily manage and update them without modifying the code, enhancing maintainability and security practices within your application architecture.
For this purpose replace these lines of code in pitionita.py script with actual API keys:
TELEGRAM_API_KEY = os.getenv("TELEGRAM_API_KEY")
OPENAI_API_KEY= os.getenv("OPENAI_API_KEY")
client = OpenAI(api_key=OPENAI_API_KEY)
bot = telebot.TeleBot(TELEGRAM_API_KEY)
In these lines, We’ve replaced hardcoded API keys in your script with variables that fetch their values from environment variables using the os.getenv() function. This approach enhances security by preventing direct exposure of sensitive keys in your code. The TELEGRAM_API_KEY and OPENAI_API_KEY variables retrieve their values from environment variables named “TELEGRAM_API_KEY” and “OPENAI_API_KEY”, respectively which will be entering them later in doprax.
By using environment variables, you can easily manage and update these keys without modifying your script. Additionally, you’ve initialized instances of the OpenAI client and the Telegram bot, passing the retrieved API keys as parameters, enabling seamless integration with both services. This implementation improves maintainability and security practices within your application architecture.
In the end, the final script should be like this:
import telebot
import os
from openai import OpenAI

TELEGRAM_API_KEY = os.getenv("TELEGRAM_API_KEY")
OPENAI_API_KEY= os.getenv("OPENAI_API_KEY")
client = OpenAI(api_key=OPENAI_API_KEY)
bot = telebot.TeleBot(TELEGRAM_API_KEY)

@bot.message_handler(commands=['start', 'help'])
def send_welcome(message):
    bot.reply_to(message, "Hola chicos, I'm pitonita! I generate python code. enter your prompt i will give you the code ")

@bot.message_handler(func=lambda message: True)
def generate_code(message):
    prompt = message.text
    if prompt:
        try:
            response = client.chat.completions.create(
                model="gpt-3.5-turbo",
                messages=[
                    {"role": "system", "content": prompt},
                ],
                max_tokens=50,
            )
            print(response.choices[0].message.content)
            if response.choices:
                code = response.choices[0].message.content
                bot.reply_to(message, "Here's the generated code:\n" + code)
            else:
                bot.reply_to(message, "No code was generated.")
        except Exception as e:
            bot.reply_to(message, f"Error generating code: {e}")
    else:
        bot.reply_to(message, "Please provide a prompt for generating code.")

bot.polling()
Create a requirements.txt
List all the Python packages your script needs in a requirements.txt file. For your script, the requirements.txt file should include pyTelegramBotAPI (which is the package name for telebot class), and openai:
pyTelegramBotAPI
openai
request
Alright, everything is set up, let’s start the deploying process! Let’s make your application come to life on the web! Deploying your app on Doprax means it’ll be awake 24/7, ready to chat with anyone, anytime.
You need to create a GitHub repository for your code. We assume you know how to do this already. We won’t explain the process here since it’s unrelated to the main topic and requires a tutorial of its own.
Let’s walk through how you can easily do this on Doprax, step by step:
Log in to Your Doprax Account
To get started, navigate to the Doprax and log in to your account. If you don’t already have an account, you’ll need to sign up for one. The sign-up process is quick and requires only basic information such as your name, email address, and password. Once you’ve signed up and confirmed your email, log in to access the Doprax dashboard.
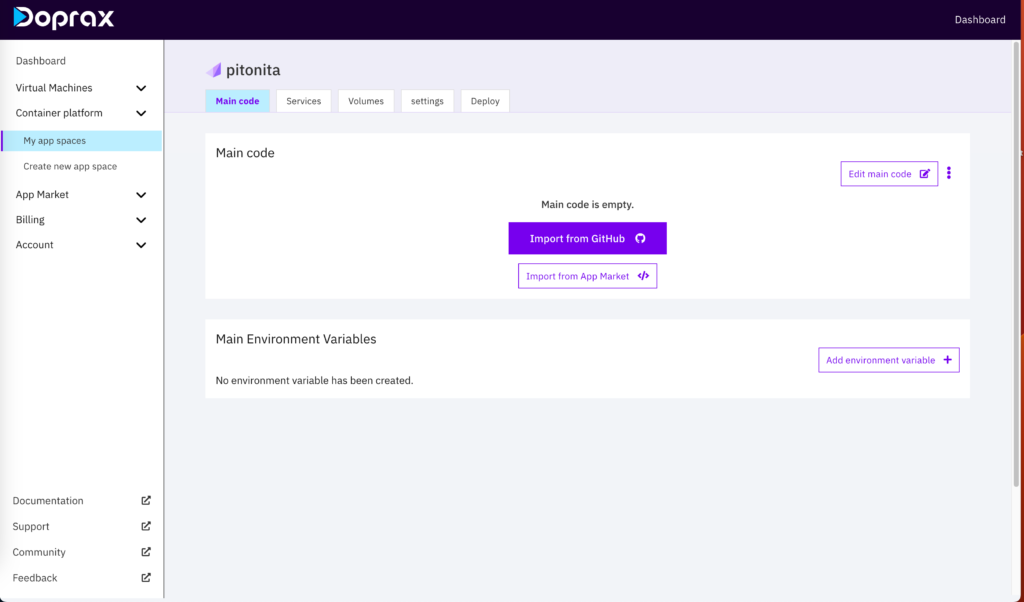
Create an App Space
Once you’re logged in, the next step is to create a new app space for your app. Navigate to the dashboard, click on the “Container Platform” option in the menu, and then choose the “Create App Space” option.
The following page will open. Choose a name for the app space and select the desired size. In the case of our application a server in Germany, the smallest size is a good option.

Select the options and then click on the “Create App Space” button.
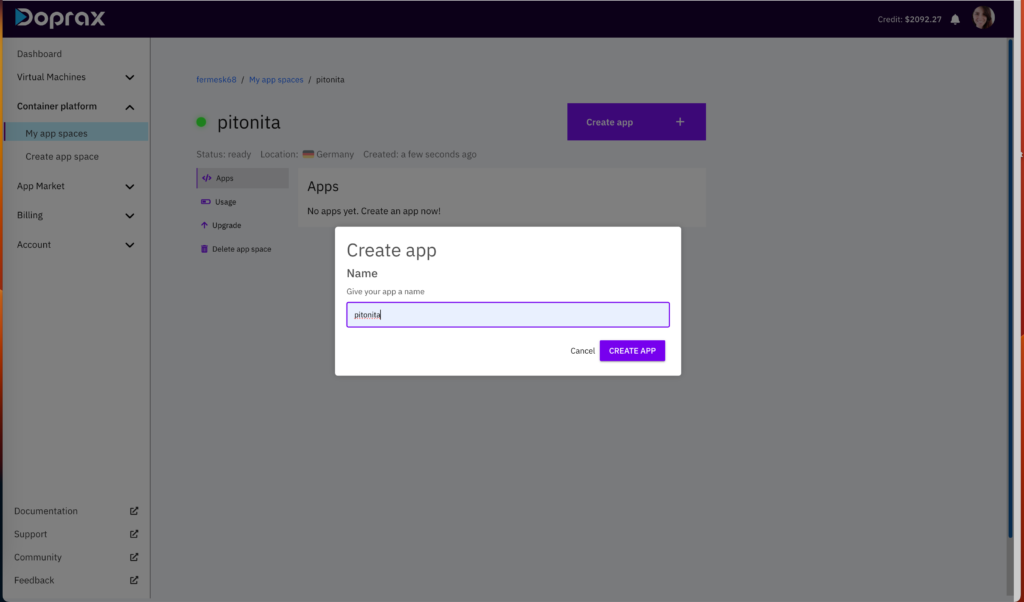
You need to create “an app” inside the app space. To create an app, click on “Create App.” Choose a name for your app, let’s say pitonita or anything you prefer then click on “Create App” button.
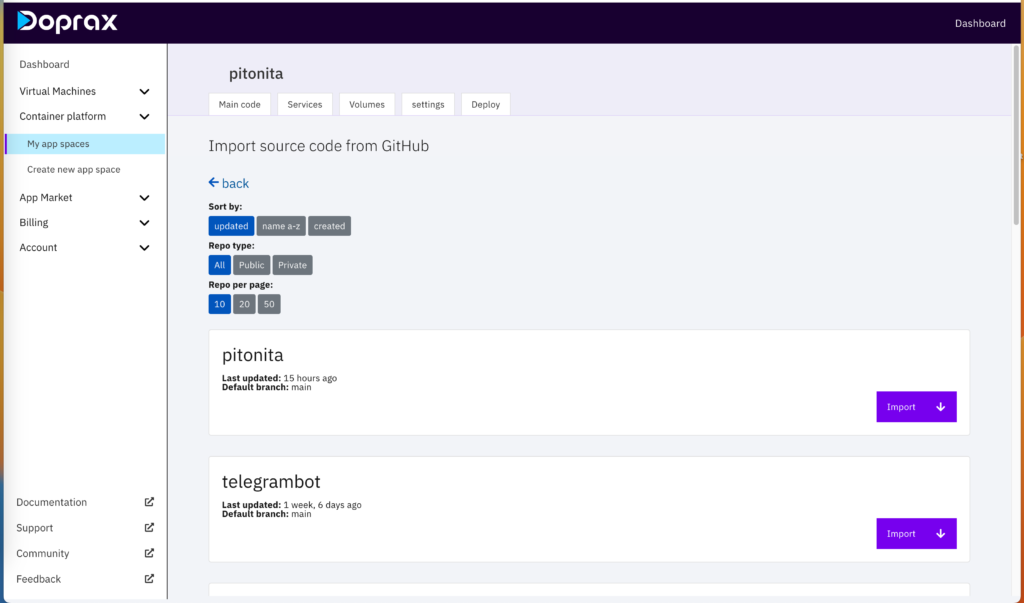
After creating your app, click on it and this page will open. If your GitHub is not connected Doprax asks you to connect your GitHub. I already connected my GitHub account.
Once your GitHub account is connected, you can view the list of your repositories. Choose the one you want to deploy.
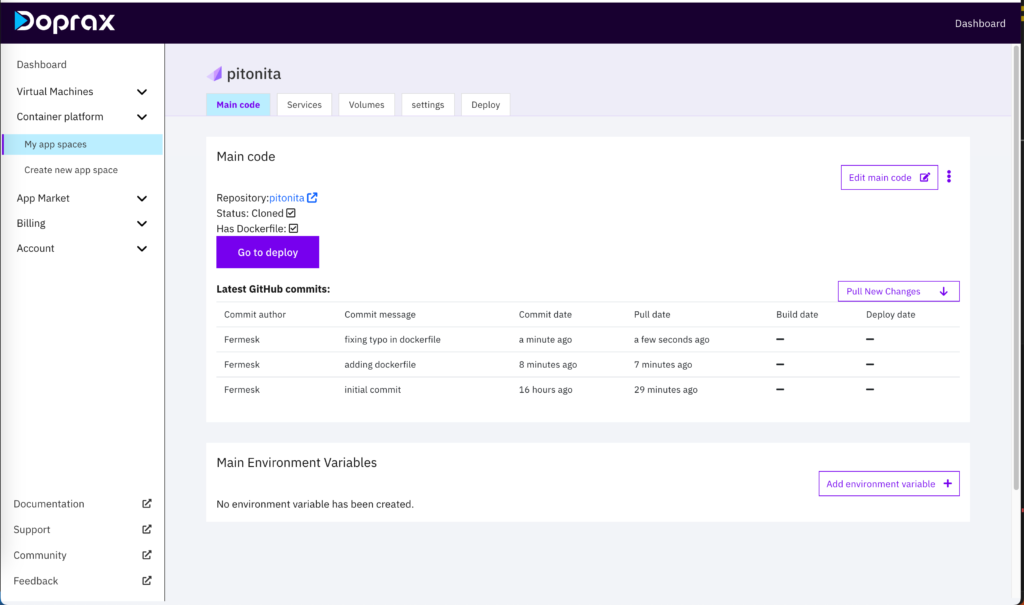
After importing the repositpry, you’ll have a dedicated page for the repository. Later, when you make changes to your code, you can update it in Doprax by clicking on “pull new changes”. As you can see I fixed a few typos 🙂
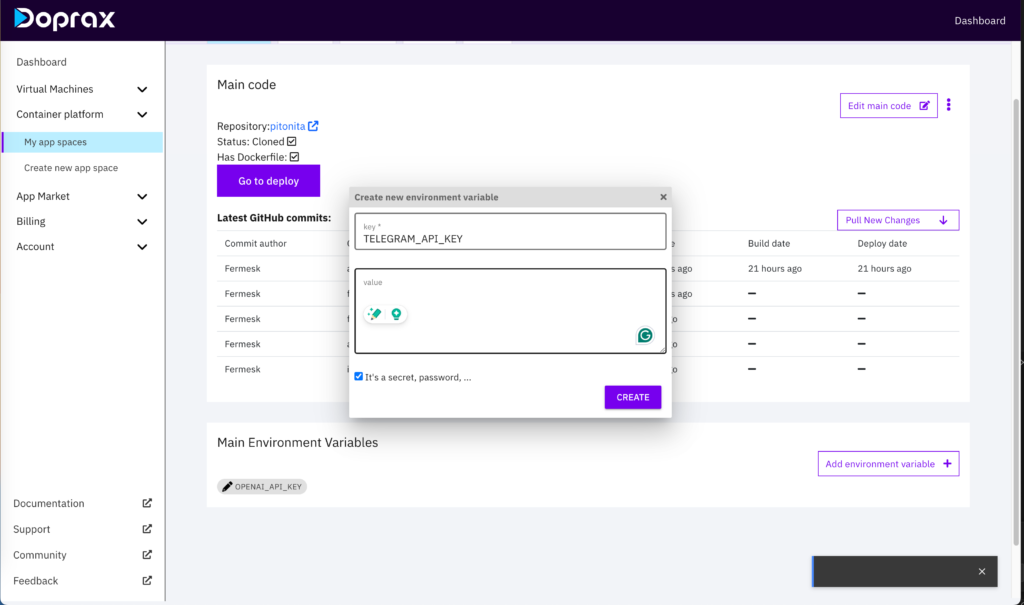
As we mentioned before we have 2 secret API keys(telegram token and Openai Api key) it’s very important to not expose these 2 keys in your code and import them as environment variables. For this purpose click on add environment variable and import each of them separately as in the picture:
Now app is ready to deploy, click on “go to deploy button”. It leads you to the deployment page.
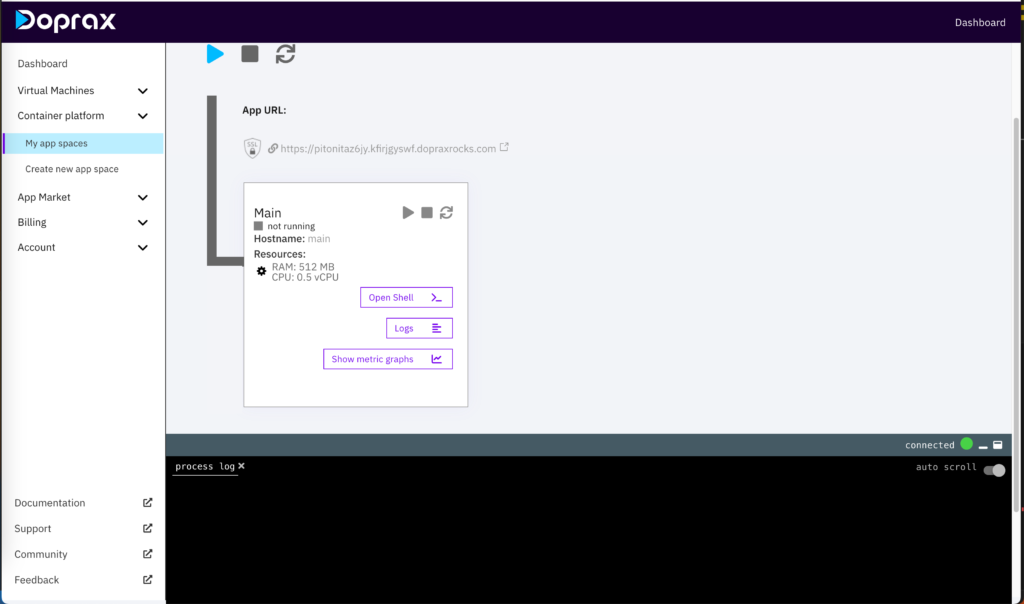
To start deploying your server, Click on the blue play button, as shown in the picture. The process takes less than one minute.
How do I know when the server is deployed and ready? When the play button changes to green and the status of the server turns into “running mode.”

Well, congratulations you deployed your openai application! Now this application is online and users can interact with it 24/7 through the Telegram bot interface.
Please if you have any questions or need help don’t hesitate to contact us, we will be more than happy to help you. Cheers?