
In this article, we are going to explore the V2Ray server and take a close look at how to run the V2Ray server on the Doprax cloud platform. V2Ray is a free network proxy tool available for Windows, macOS, Linux, and mobile devices.
Its purpose is to assist users in bypassing internet restrictions and blockages, enabling a more secure and unrestricted web experience. In contrast to standard VPN services, V2Ray employs a complex system that includes various protocols to route online traffic.
It can run on Windows, macOS, Linux, and even mobile platforms.
It is designed to help users circumvent internet censorship and blockades, providing a safer, more open internet experience. Unlike traditional VPN services, V2Ray operates with a more sophisticated mechanism, offering multiple protocols within its ecosystem to tunnel internet traffic.
Core Components
Before diving into the article, it’s very helpful to understand v2ray core components. It has 2 core components:
V2Ray Server: The server component is where V2Ray is hosted. It receives connections from clients, processes them according to the user’s configuration, and forwards the traffic to the intended destination. It can be deployed on cloud platforms, personal servers, or even on a home network.
V2Ray Client: The client side of V2Ray is installed on the user’s device, with different clients for various operating systems such as v2rayN for Windows, v2rayNG for Android, v2rayA for Linux, and V2box for iOS and Mac. It sends requests to the V2Ray server, which securely routes the traffic to bypass internet restrictions or surveillance.
Protocols and Routing Rules: V2Ray supports a variety of protocols, such as VMess, Socks, HTTP, Shadowsocks, and more. Users can configure routing rules to determine how traffic is handled, allowing for granular control over their internet connections.
Setting up V2Ray Server on Doprax: Step-by-Step
1)Install V2Ray client based on your OS: Depending on the OS you use, you choose a suitable client for your device for example if you use Android the proper client would be v2rayNG, for Mac, it’s v2box, etc,…We are going to use Mac version which is called v2box
2) create app space: Create an app space, deploying the ready-to-use v2ray app in Doprax with a few clicks.
3) Setting up the client
4) connect v2ray
Let’s start!
Step 1: Install V2Ray Client
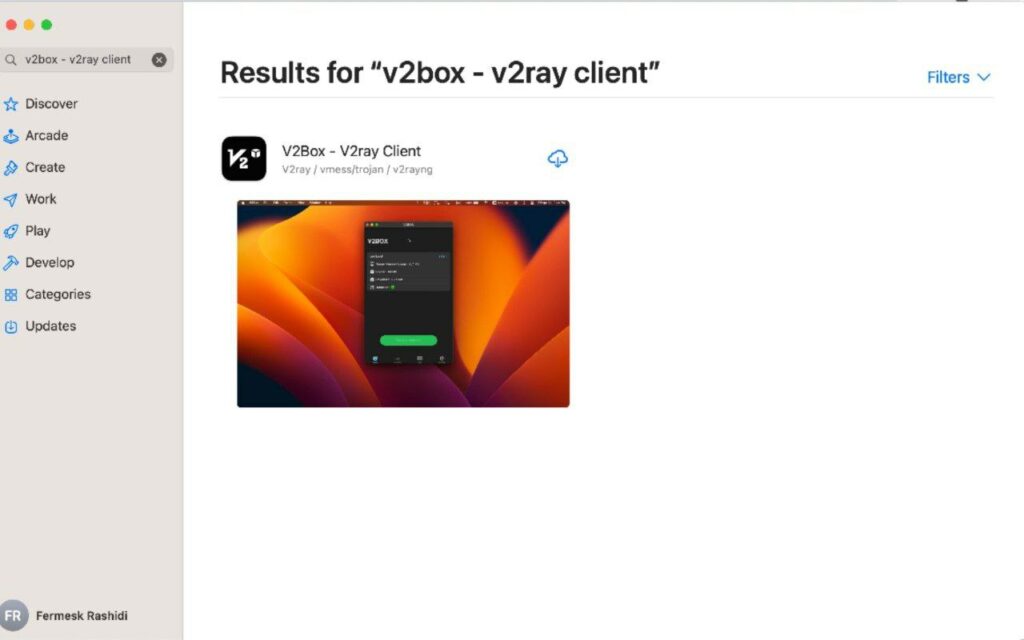
Based on your operating system, choose a suitable client for your device. For example, if you use Android, the proper client would be v2rayNG; for Mac, it’s V2box, and so on. I’m using Mac so the suitable client is v2box. For this purpose open the app store search v2ray click on v2raybox and install:
Step 2: Log in to DopraX, navigate to the dashboard, click on the “Container Platform” option in the menu, and then choose the “Create App Space” option.
The following page will open. Choose a name for the app space and select the desired size. In the case of V2ray with a server in Germany, the smallest size is a good option.
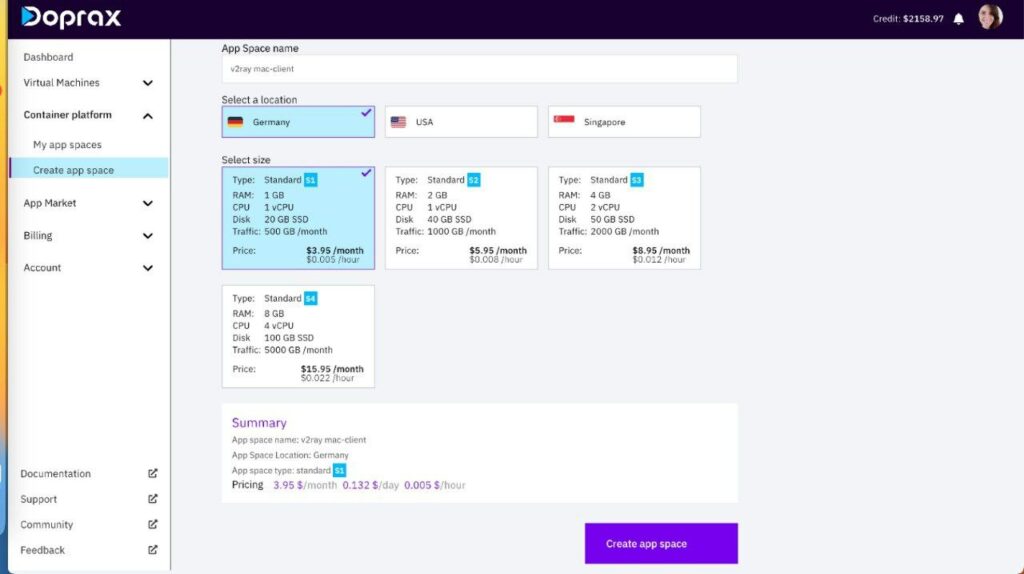
Select the options and then click on the “Create App Space” button. App space created and the following page will open.
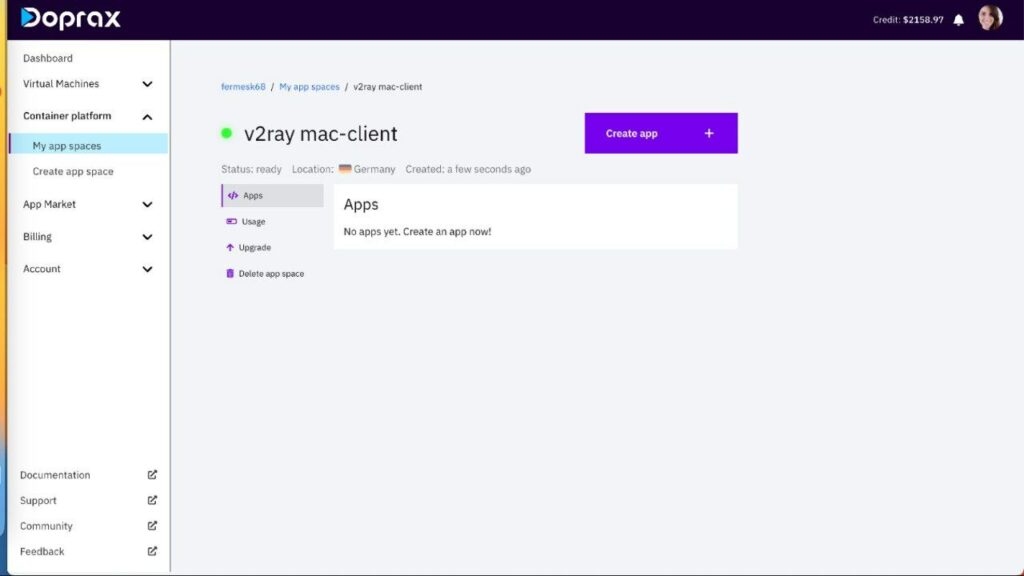
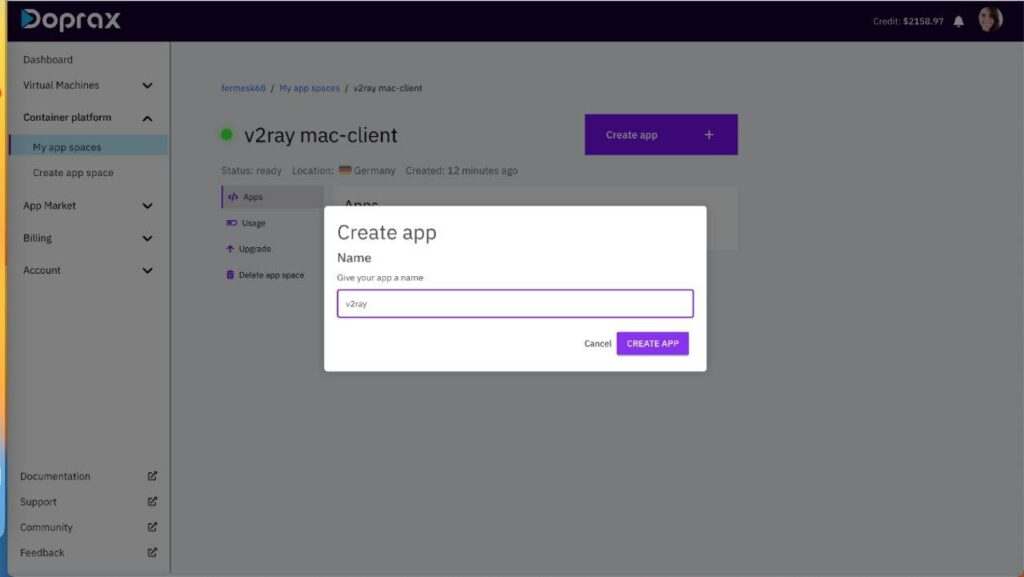
You need to create “an app” inside the app space. To create an app, click on “Create App.” Choose a name for your app, for example, v2ray or anything you prefer then click on “Create App” button
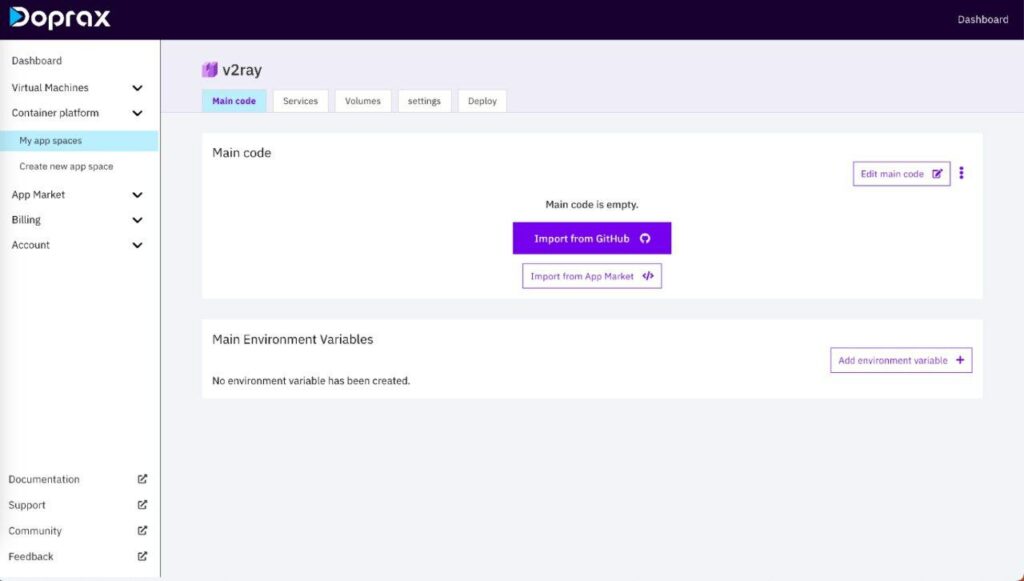
After creating the app, click on it and this page will open. To run the V2ray server, we need to deploy the related code. For this purpose, DopraX provides us with two options:
1)Import from GitHub
2) Import from the App Market.
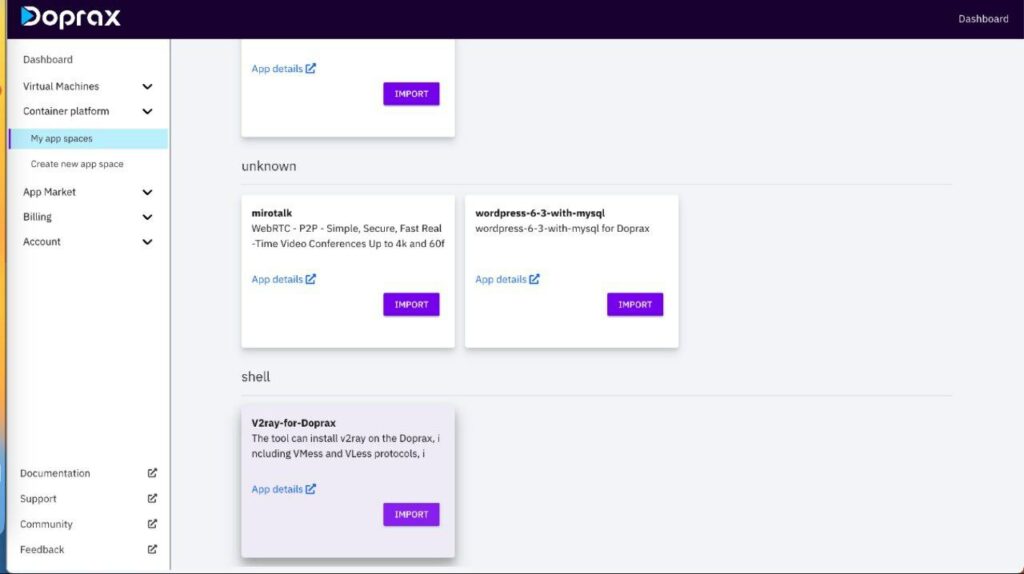
In this case, we want to use the “Import from App Market” option because it is much easier and can be done with just three clicks.
Click on the “Import from App Market” button. The App Market page will open. Scroll to the bottom of the page and select the “V2ray app for Doprax.”
After selecting, on this page there you can see a pop-up that Doprax.yaml dependency file detected.
Click “yes, create them” then refresh the page.
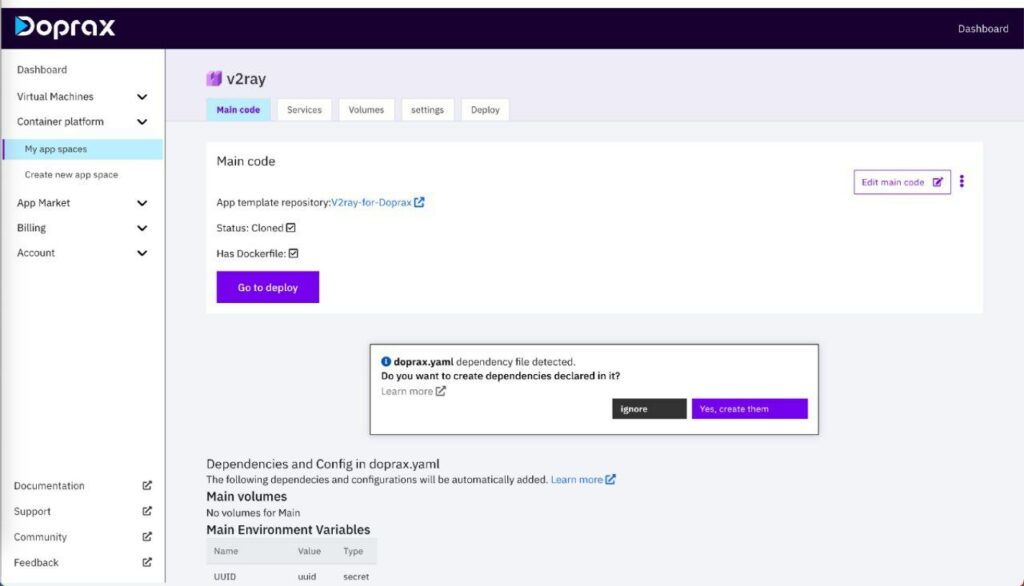
Now app is ready to deploy, click on “go to deploy button”. It leads you to the deployment page as you can see in the picture.
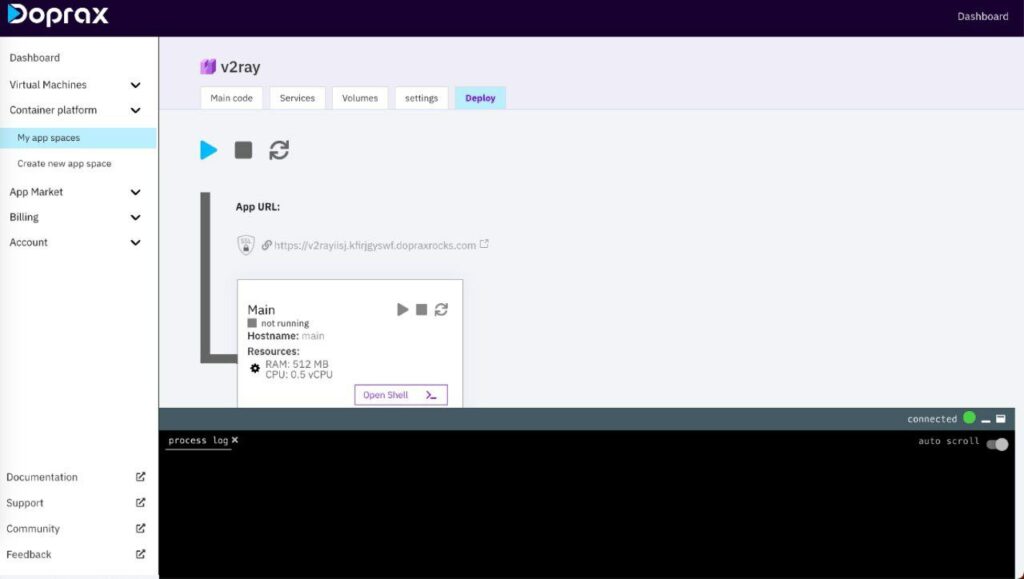
To start deploying your server, Click on the blue play button, as shown in the picture. The process takes less than one minute.
How do I know when the server is deployed and ready? When the play button changes to green the status of the serve turns into “running mode.”
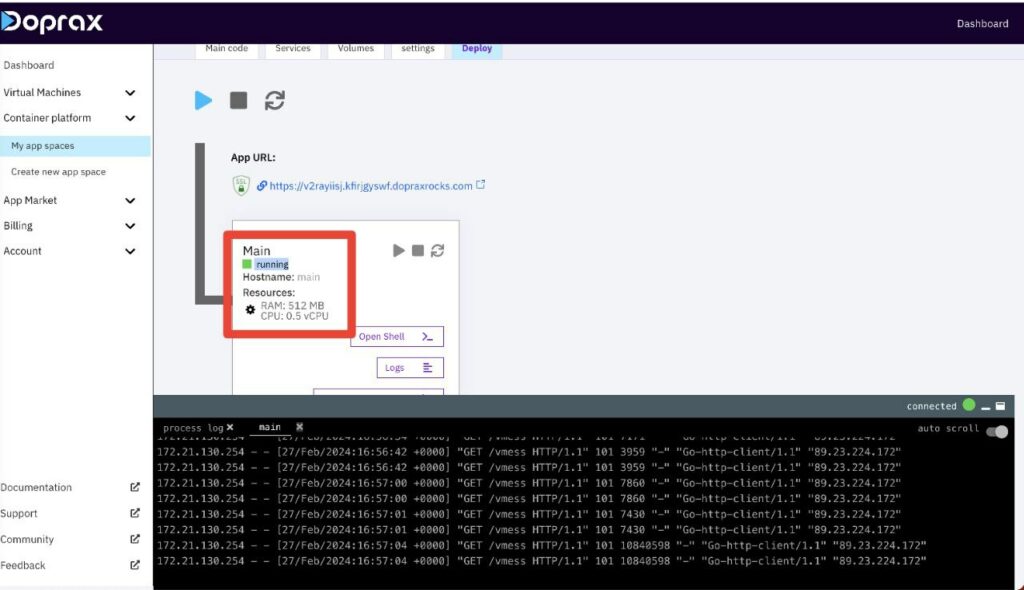
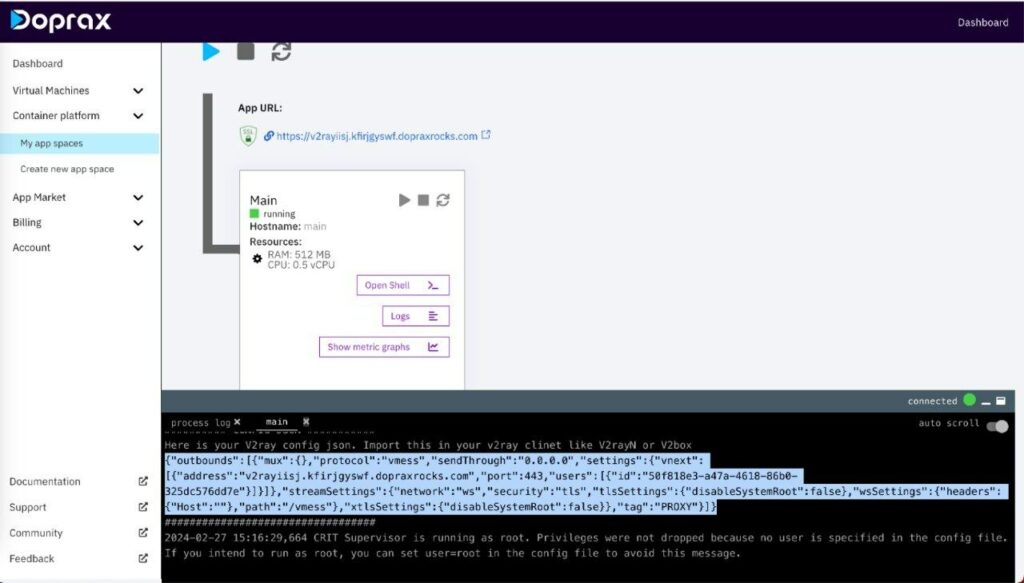
Now, click on the “Logs” option in the main block and scroll up in the terminal until you reach this part which is a JSON containing configuration data. Copy this JSON.
Open the V2ray client, click on the “+” icon, and select “Import V2ray JSON from Clipboard.”
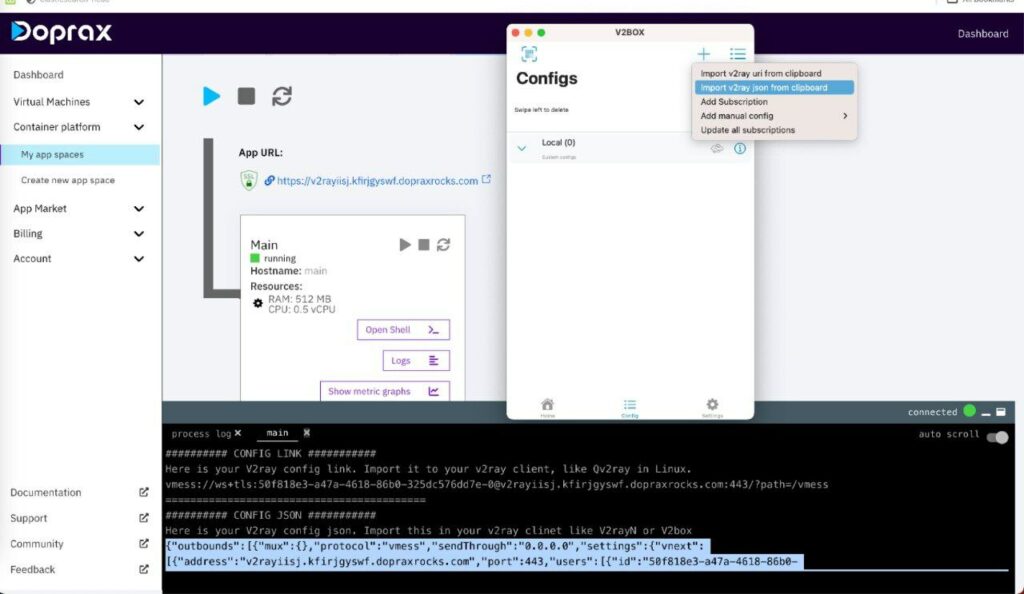
After importing JSON, click on the home icon you should see the information about the server. Then tap on “Tap to Connect!”
Yayyyy! Your V2ray server is up and running with just a few clicks! If you have any questions, please let us know; we will be more than happy to help you. 🙂

